
¡Buenos
días de martes! Sabéis lo mucho que nos gusta el DIY, ¿verdad? Últimamente
estamos aprendiendo más cosas con trapillo, pero la verdad es que el patchwork
es otra de nuestras pasiones (ya vistéis un post AQUÍ).
Hoy
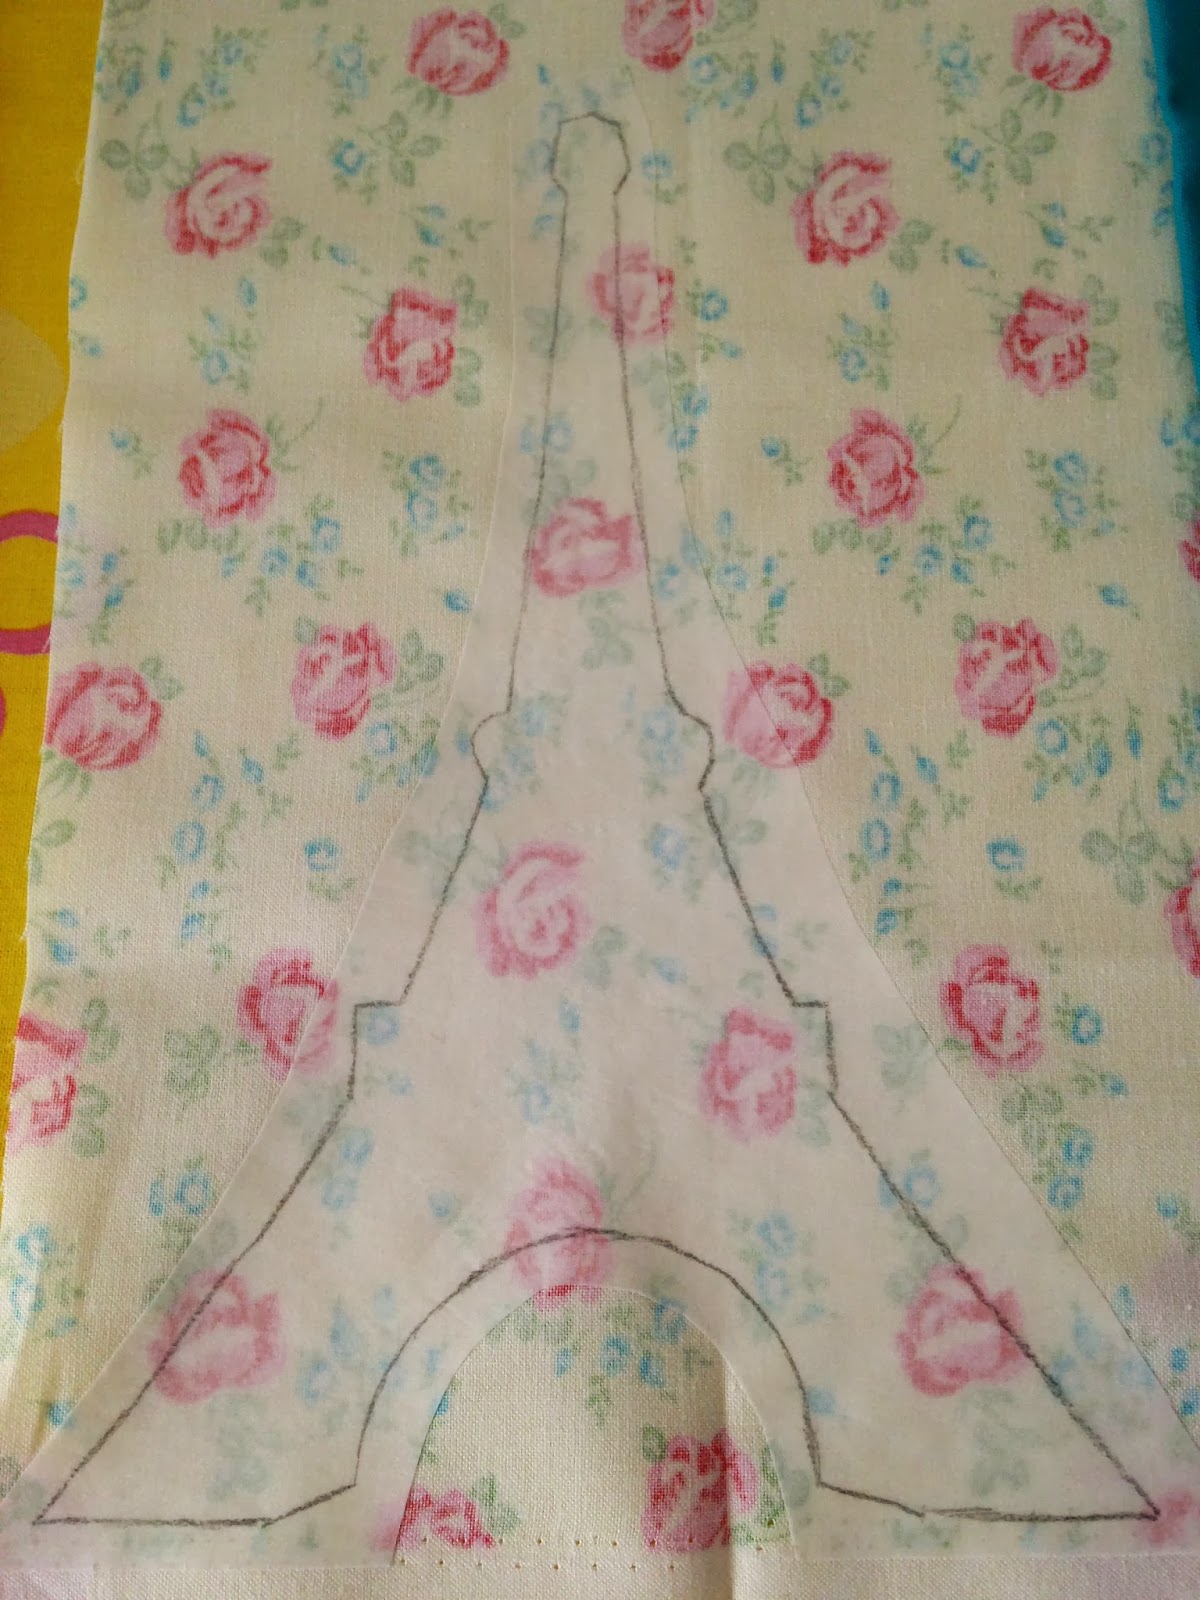
os traemos uno de nuestros últimos diseños con patchwork, este dibujo de la
torre Eiffel que decidimos ponerle a una de nuestras camisetas. Os contamos cómo lo hemos hecho. :)
Good Morning! You know how much we love
the DIY. Now we are learning to make things with trapillo, but the truth is that
patchwork is another of our passions (you saw a post HERE).
Today we bring you one of our latest
designs with patchwork, this picture of the Eiffel tower we decided to put in
one of our T-shirts. We told you how we've done it. :)
Necesitamos:
-Tela
sobre la que coser el patchwork (En este caso es una camiseta básica)
-Telas
de diferentes colores (Deben ser de algodón 100%)
-Hilos
de patchwork de diferentes colores y que queden bien sobre las telas a
utilizar.
-Aguja
de patchwork.
-Papel
para pegar la tela a la camiseta.
-Lápiz
para pintar en el papel.
-Plancha
para pegar el papel.
-Plantilla
del dibujo que queremos usar (Si son letras, recordad imprimirlas al revés, ya
que al pegarlas a la camiseta el dibujo queda del lado contrario)
We need:
-Fabric on which sewing the patchwork (in
this case is a basic t-shirt)
-Fabrics of different colours (must be
cotton 100%)
-Threads of different colours and to
match the fabrics.
-Patchwork needle.
-Paper to glue fabric to the t-shirt.
-Pencil to paint on the paper.
-Iron to stick the paper.
-Templates of the drawing you want to
use (if they are letters, remember to print them in reverse, since sticking
them to the shirt drawing is on the opposite side)


Pasos/
Steps:
Cogemos
la plantilla del dibujo que hemos impreso y calcamos el dibujo sobre el papel
con pegamento.
We take the drawing template that we
have printed and copy the drawing on the paper with glue.

Recortamos
el papel dejando un cm alrededor del dibujo. Lo colocamos sobre la tela por el
lado del revés y con la plancha ya caliente, presionamos ligeramente (nunca con
vapor), notaréis que el papel se adhiere en seguida a la tela.
Cut the paper leaving a centimeter
around the drawing. We put it on the fabric on the reverse side and with a hot
iron, we press it lightly (never using the vapour), you will notice that the
paper sticks immediately down to the fabric.
Recortar
ahora el dibujo bien y quitar el papel. Veréis que la capa de pegamento se ha
quedado en la tela.
Colocar
la tela sobre la camiseta bien planchada para que luego no haya arruguitas. Una
vez ya tenemos claro como y donde va a ir nuestro dibujo, planchamos la tela
encima de la camiseta y quedará bien pegado.
Now cut the drawing well and remove the
paper. You will see that the layer of glue has been stuck in the fabric.
Place the fabric over the ironed shirt
so there are no creases. Once we know how and where it will go our drawing,
iron the fabric on top of the shirt.

Ahora
ya es momento de empezar a coser con el punto festón alrededor de todo nuestro
dibujo.
Now it is time to start sewing the
thread in blanket stitches around all our drawing.


Aquí
os mostramos un dibujo del punto festón y en el post anterior hay un vídeo
explicativo para que os aclaréis mejor.
Here we show you how to do the blanket
stitch and also you can watch our video on the first post explaining how to
sew.
Esperamos
que os guste y que os animéis a probar vosotras también, ya que es sencillo y
muy divertido! ¡Feliz día!
We hope you like it and try it also
because it's simple and fun! Happy day!
Sources: allaboutyou.com

Joe que chulo!!!! La verdad que si que ha quedado bonito!!!
ResponderEliminarLa tela de las flores es super bonita además, me gusta mucho!!!! A ver si saco algo de tiempo y os copio la idea
Un besito
www.lahuellademistacones.es
Claro! Anímate! Es super fácil :)
EliminarMe ha gustado mucho la idea, para customizar una camiseta basica, intentare probarlo
ResponderEliminarQuñe bonito DIY! Me encanat el resultado!! ...HOY EN MI BLOG!! NO AL RACISMO!! CON LOOK BLACK& WHITE!! OS ESPERO!! http://adribohocloset.blogs.elle.es/blackwhite/
ResponderEliminar¡Anda! Papel con pegamento claro ... ostras qué gran idea (y que lerda yo).
ResponderEliminar¡Muy chulo chicas!
que apaño mas chulo
ResponderEliminarTrendy U
pero que chula ha quedado me gusta mucho.Un besazo
ResponderEliminarhttp://www.thedesire.es/
http://www.bloglovin.com/en/blog/10612739
Me encantaaa!! Es genial!!
ResponderEliminarUn besito!
http://essenceofelectricsbubbles.blogspot.com.es/
Ha quedado preciosa!!! genial post, un besazo
ResponderEliminarwww.lespetitsdetails.es
Parece muy sencillo, hasta la parte de coser, ahí pasaría palabra y le diría a mi madre que continuase ella! Porque yo soy negada! :) Pero es una idea genial, gracias por enseñarnos a hacer estas cositas! :)
ResponderEliminarUn beso enorme chicas!
Lucia Gallego Blog
Lucia Gallego Blog Facebook
Que chulo! muy buen post, me has dado muy buena idea para "reciclar" una camiseta básica que ya no me pongo..jijii
ResponderEliminarSi quieres nos seguimos y estamos en contacto!
Un besito guapi! enhorabuena por el blog!
MAD in GLAM ♡
me gusta que dediquéis post al DIY puesto que me encanta. Me encanta hacer mogollón de manualidades! Mi perdición es hacer pulseras y hace unos meses descubrí el washi tape. He visto en instagram que a vosotras tb os gusta! así que miraré para cogeros ideas tb. Subiré a mi blog muchas cosas tb! porque ya veo que no soy la única a la que le gusta! jeje
ResponderEliminarun besoo